
Quick Setup Guide:
Create an email address using the @PolarisMail.net domainHere is our quick guide to help you set up a new email address using our domain @polarismail.net. This guide applies to both Basic and Enhanced email hosting services.
Hi and welcome to PolarisMail!
To set up your new email accounts, follow these steps to create the email address, and access your mailbox using our Webmail. You will also find the steps to add the email account to your preferred email application on the desktop, smartphone, or tablet (using common applications like Outlook, Apple Mail, Thunderbird, Android Mail, etc.).
Step 0: Sign up
The first step is to sign up for a PolarisMail email hosting service and add the necessary number of accounts, Basic or Enhanced, to your subscription using the Billing Panel.
Step 1: CreatE a new Email Address
To add a new email account:
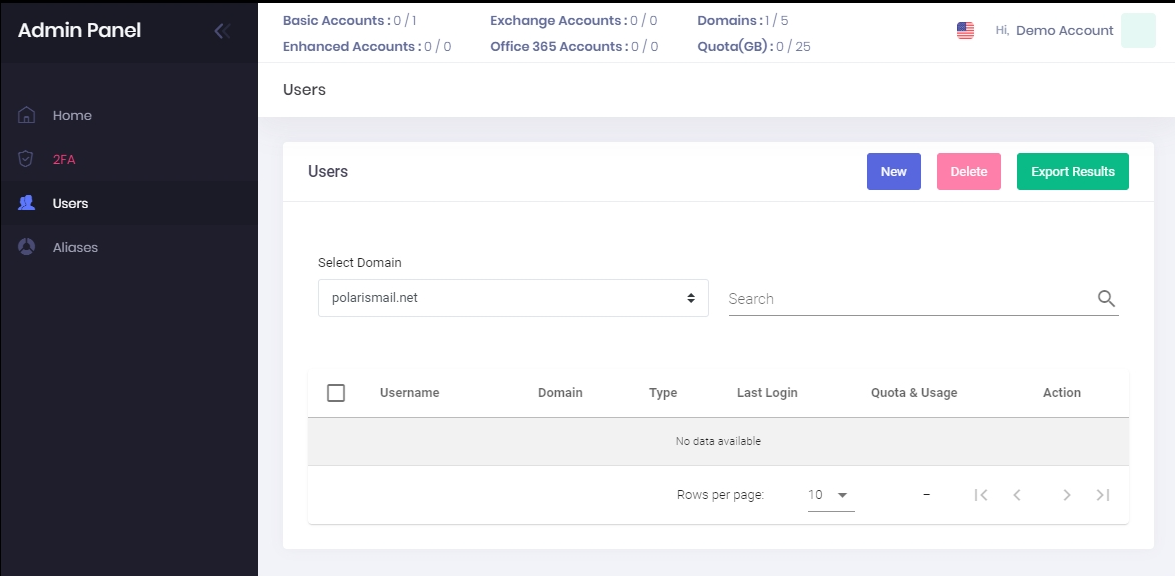
1. Log in to the Admin Control Panel with your Admin username (the one you used at Step 0 when you signed up).
2. In the Users tab, from the Select Domain drop-down, select the domain polarismail.net and click the New button.
3. A new pop-up window will show where you can fill in the email address details:
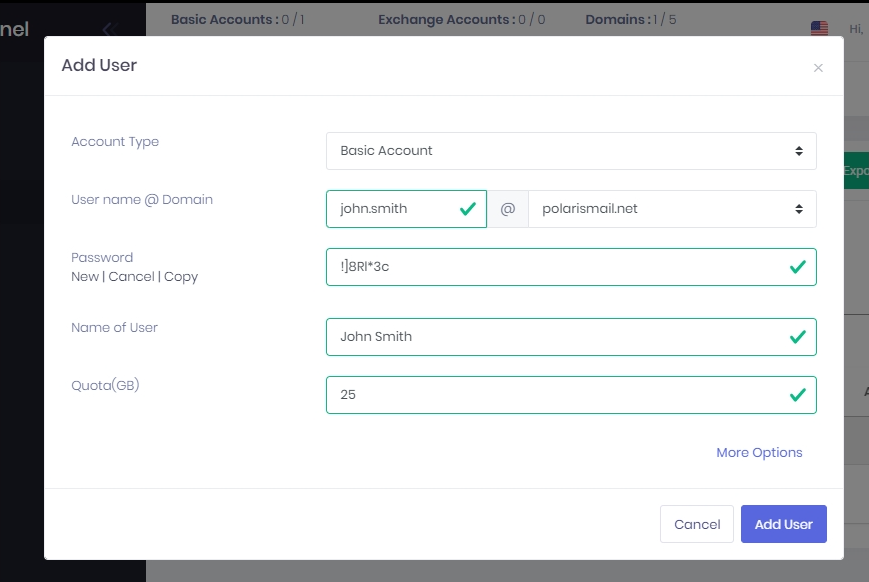
Account Type: choose Basic or Enhanced, depending on what type of mailbox you have added to your subscription at Step 0.
- User name: your desired email address (before “@” sign; we will check for availability) – you can use your name, for example. Letters, numbers and dots are allowed; special characters are not accepted.
- Domain: choose polarismail.net from the drop-down
- Password: must be a strong password; minimum 8 characters and must include: at least one lower case, one upper case character, one number and one symbol. You can generate a random password by clicking on the New button under the Password text – don’t forget to Copy you new password to the clipboard.
- Name of User: your full name
- Quota: the size of the mailbox, in GB; you can type in any value between 0.1 and 100. The size must be smaller than the available storage space.
You can also add optional settings for your new email address by clicking on the More Options link.
- Language: the default is English.
- 2Factor Auth: if you want to allow a second layer of authentication, called Two Factor Authentication, for this email account – the default is Allowed.
- Localization: the default timezone for this email account.
- Date Format: the default format for dates.
4. Finish adding this new email account by clicking the Add User button.
That’s it; your new email address is ready to use!
Step 2: SEND YOUR FIRST EMAIL
Now that you have set up your email address, you can start using it with your favorite Internet browser (Chrome, Firefox, Safari, etc.) by accessing the Webmail. The Webmail doesn’t need additional setup and you can access it from any computer, smartphone, or tablet without installing other applications.
Webmail link: webmail.polarismail.net
Username: your full email address (the [email protected] from Step 1)
Password: your email address password (from Step 1)
You can also access the Webmail straight from your Admin Panel by clicking on the envelope icon on the Users page. You can save the link and bookmark it to your favorite browser for quick use in the future.
Congratulations, you have completed the setup of your email address! You can now send your first email and let everybody know you have a new address.
WHAT’S NEXT?
Optional: SET UP YOUR EMAIL CLIENT to use YOUR NEW EMAIL ADDRESS
- Basic email addresses can be added as IMAP accounts: you can follow this guide.
- Enhanced email addresses can be added as ActiveSync accounts: you can follow this guide.
Getting help
Switching to a new email provider can be intimidating. That’s why our Support Team is here to answer your questions. If you need help setting up your new email address, you can talk to our Support Team through chat or ticketing system. Our Support Team can also help you move your previous mailbox, contacts, and calendar to your new one.