
Quick Setup Guide: ActiveSync
How to add your Enhanced email account to any mobile deviceHere is our quick guide to help you set up your PolarisMail Enhanced email address to your favorite email client on any mobile device. With ActiveSync, you can not only synchronize your emails, but also calendars, contacts and notes.
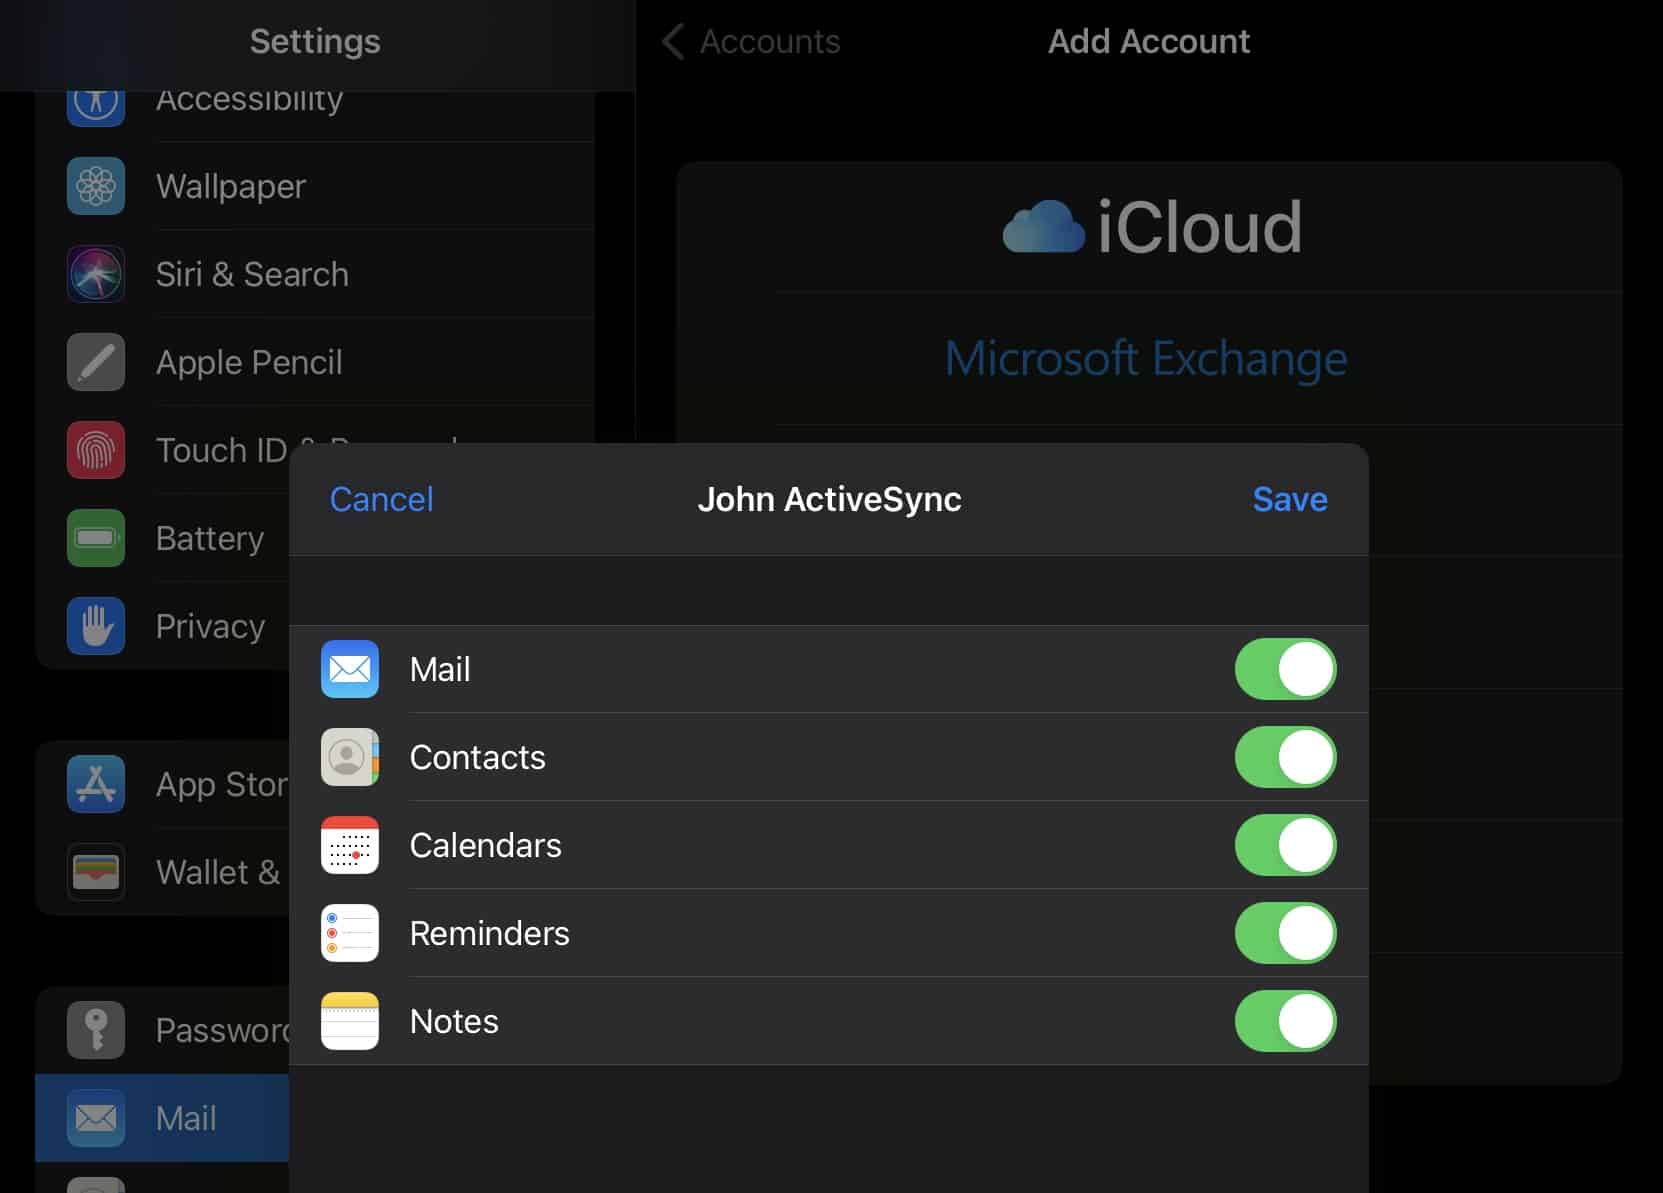
Calendar
Contacts
With ActiveSync, you can synchronize your mailbox on multiple mobile devices, such as smartphones and tablets, using your favorite applications. And you can use any e-mail app available on your device, including the native apps for email, calendar and contacts.
Even better, you can use ActiveSync to not only sync you email, but also contacts, calendar and notes. To set up your email account as an ActiveSync, follow these steps to add the email account to your mobile device.
ActiveSync is available for Enhanced email accounts only.
Pre-requisites: Sign up and create the email address
The first step is to sign up for a PolarisMail email hosting service and add (or upgrade to) the Enhanced accounts to your subscription, using the Billing Panel.
After you sign up, login to the Admin Control Panel and create an Enhanced email address. You can also upgrade an existing Basic mailbox to Enhanced.
Follow this guide to create an email address using your own domain or this guide to create an email using @polarismail.net, our free domain.
Example Setup
Here is an example configuration for an iOS mobile device using ActiveSync (available for an Enhanced mailbox only):

Step 1: Add a new Account to your mobile device
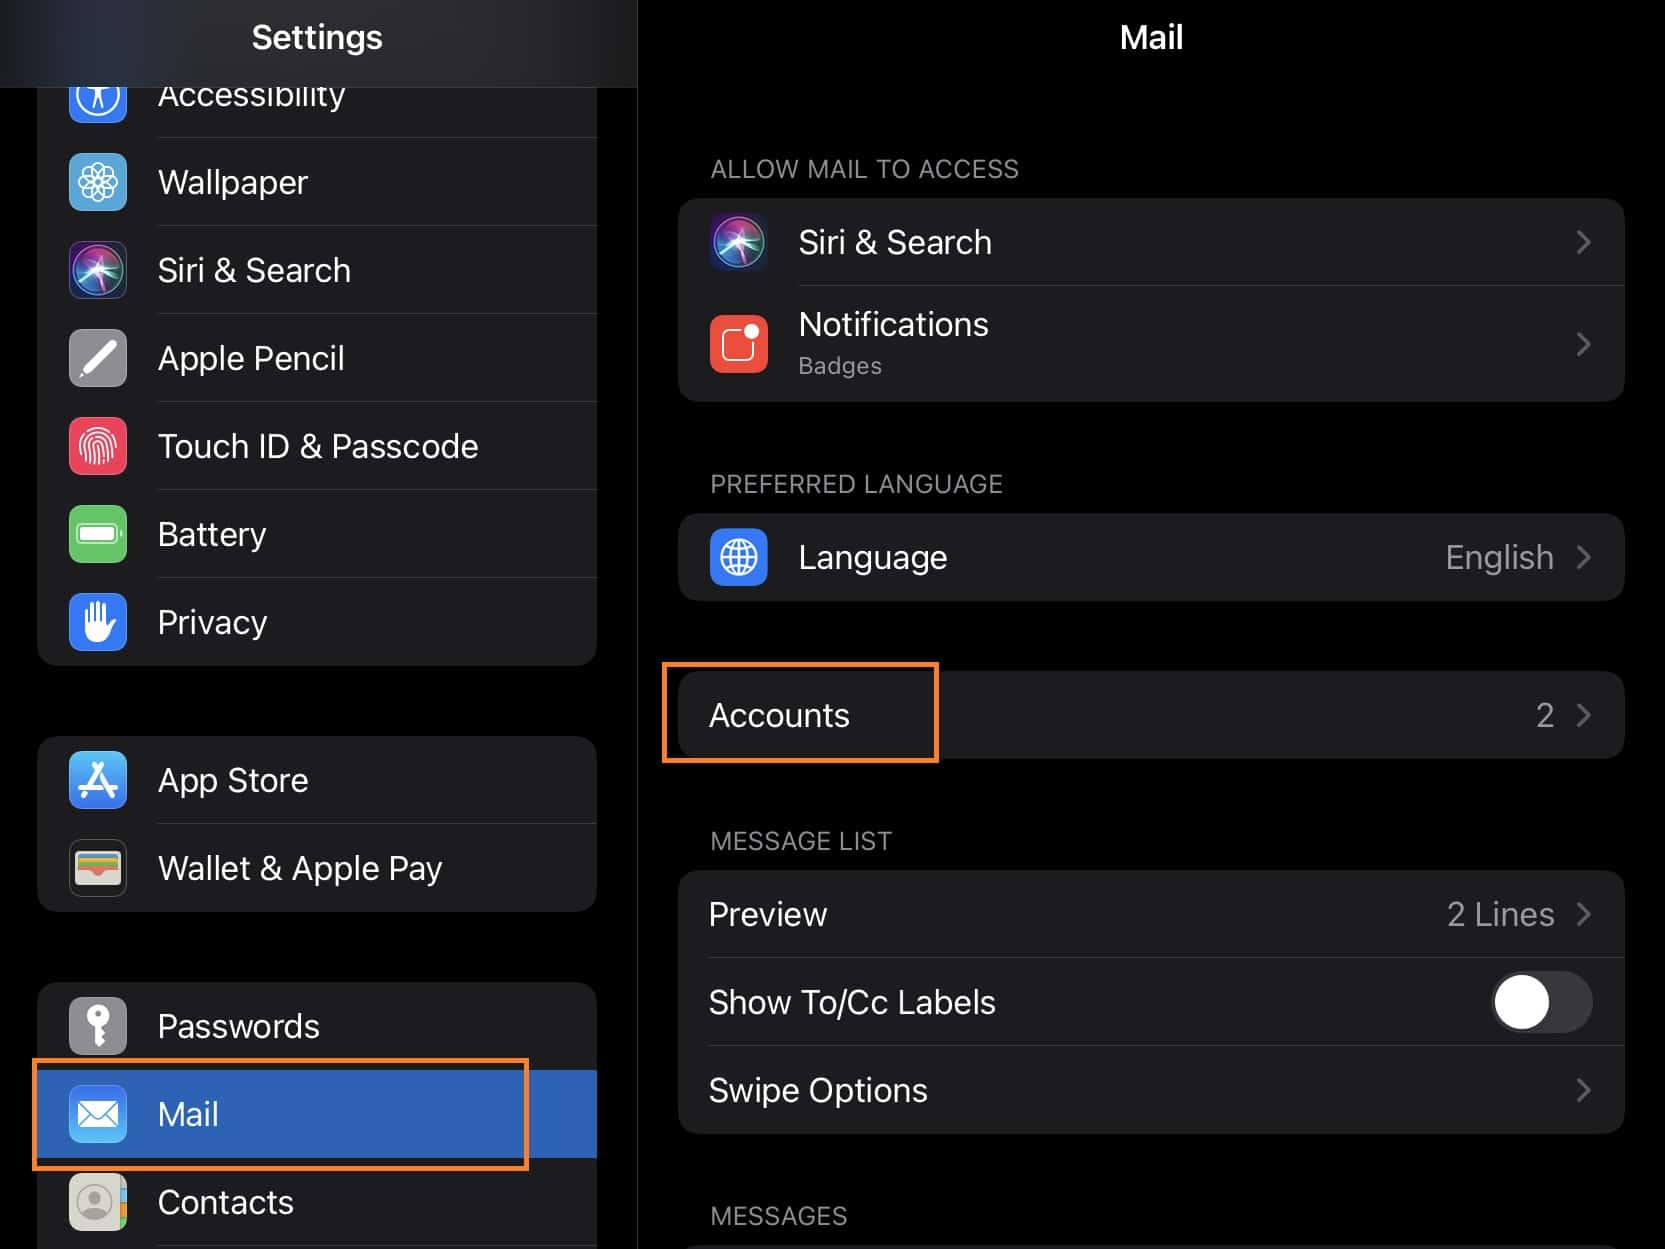
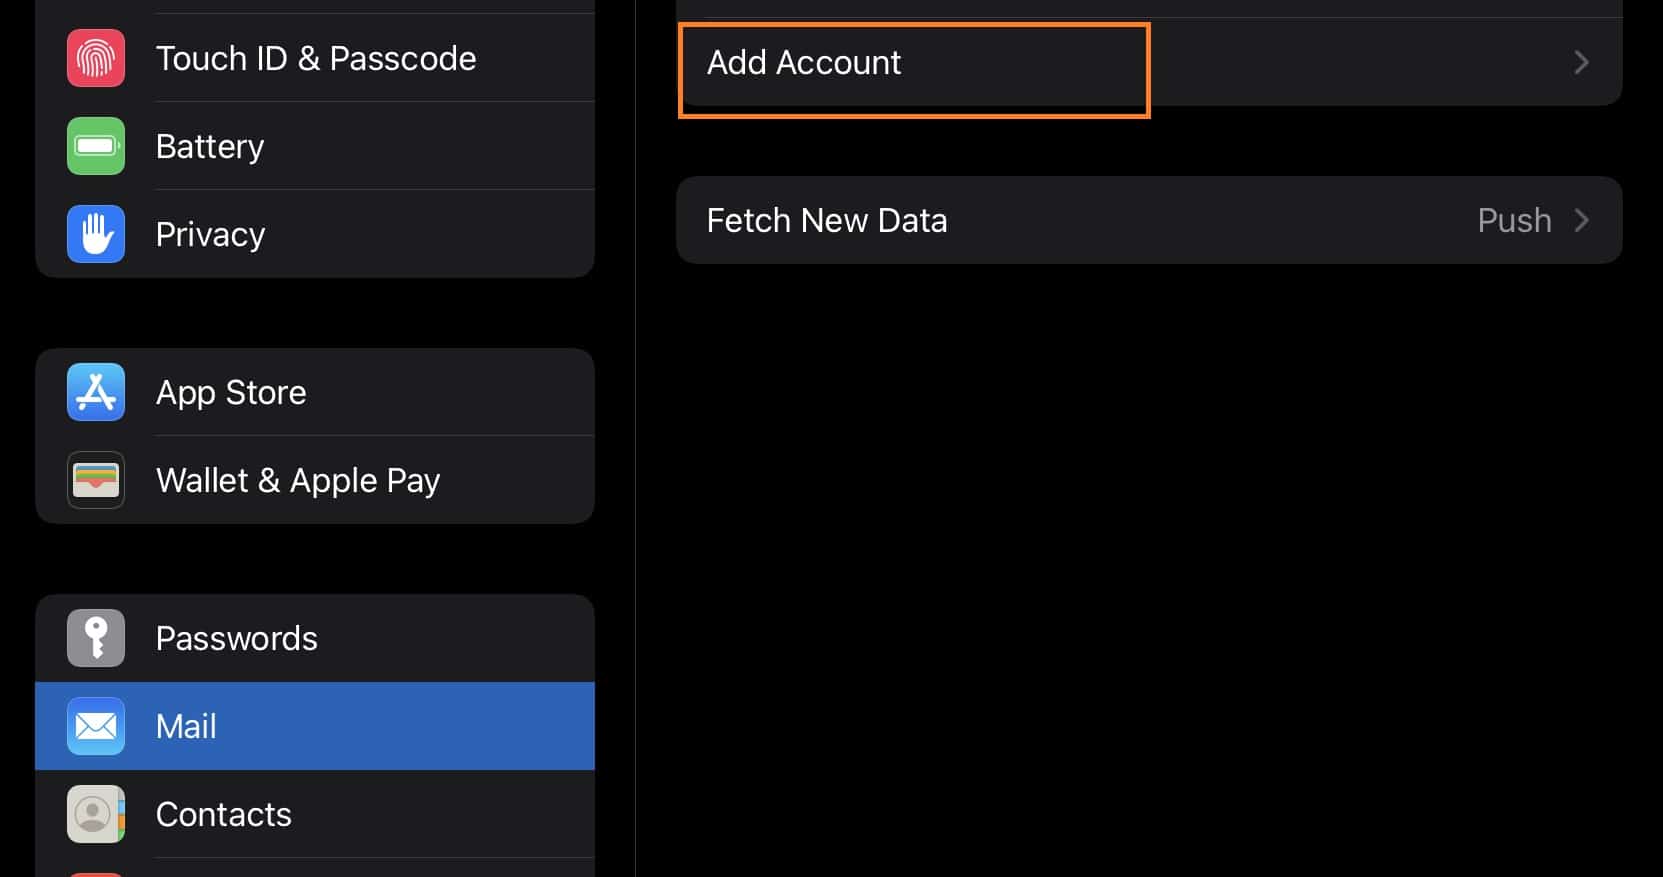
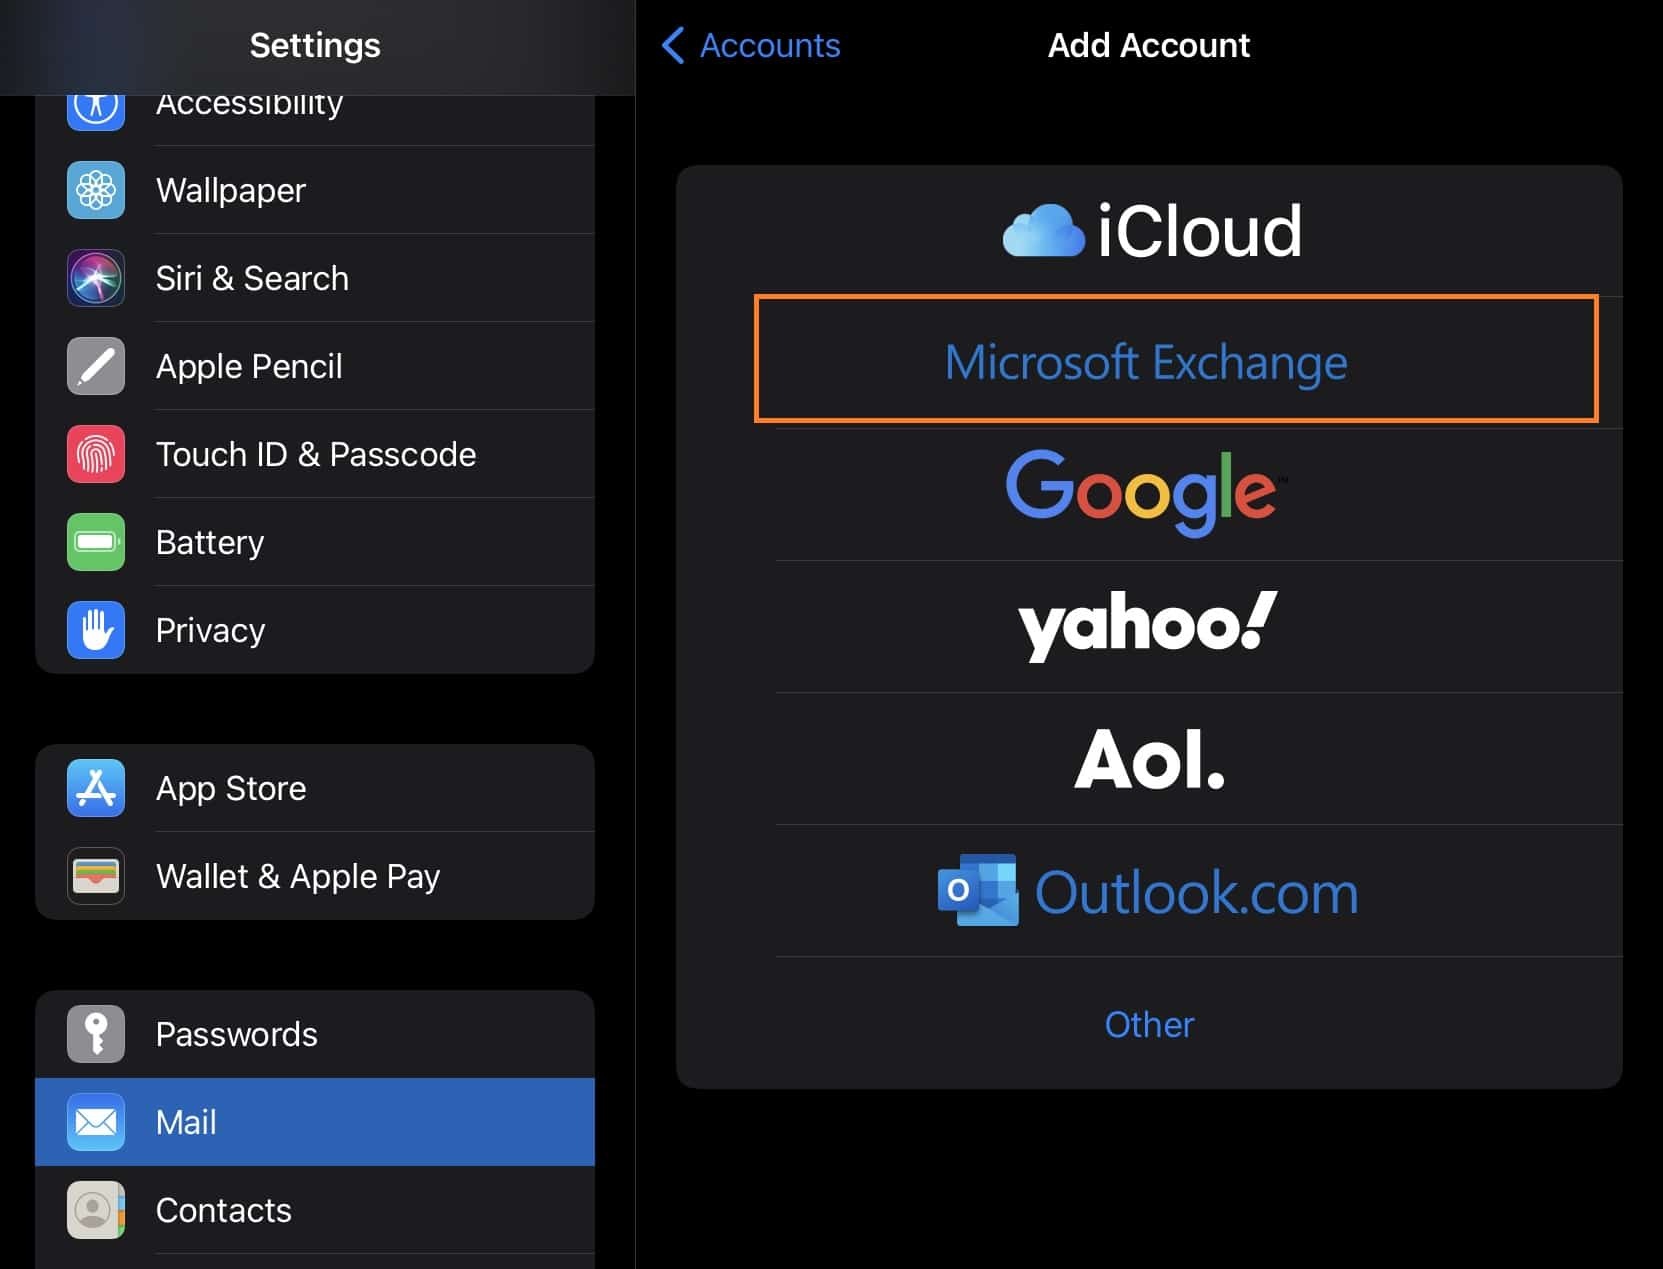
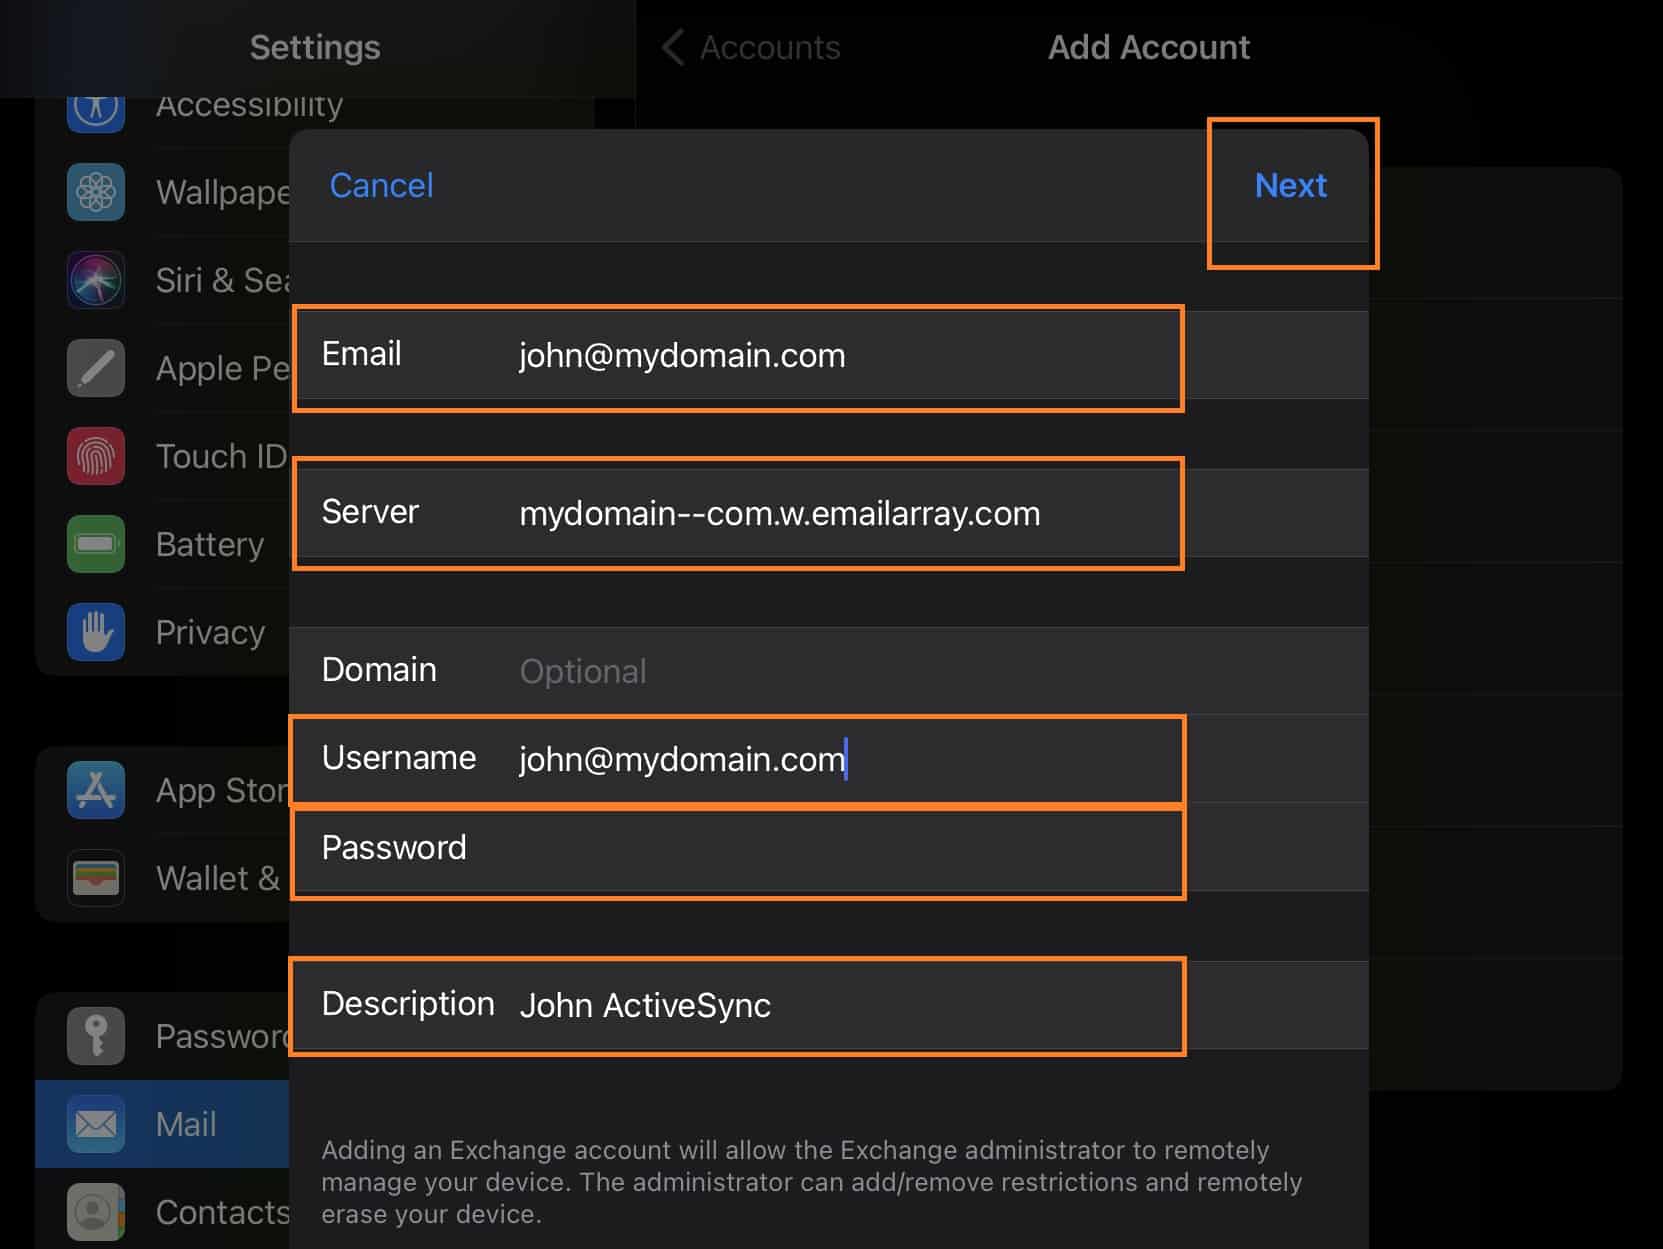
1. In your mobile Settings, find the menu related to Mail or Accounts. Find the option to Add account and select a new account of type ActiveSync. Some devices might call this type of account Exchange or Microsoft Exchange.
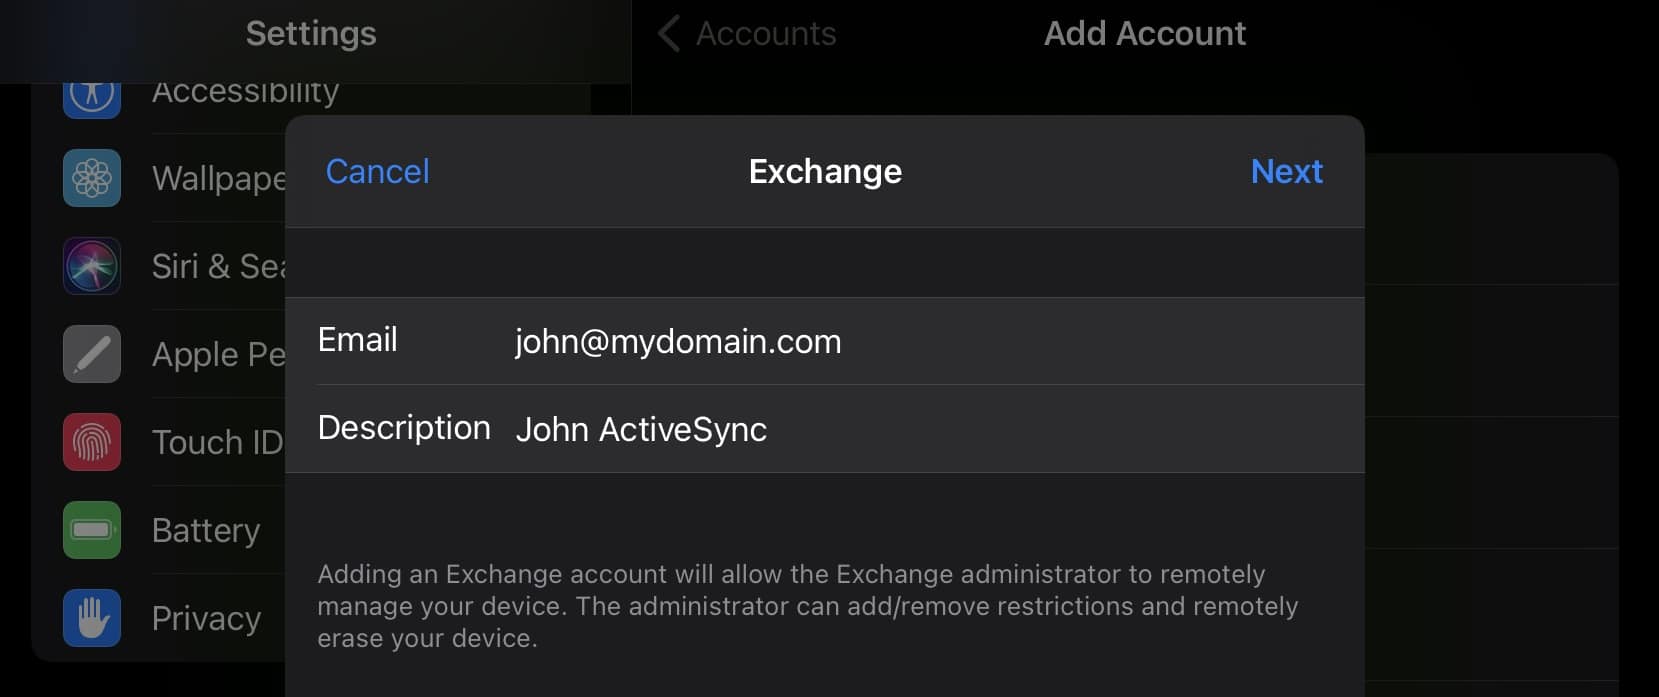
2. If you have setup Autodiscover for your domain in the DNS, you can skip the Advanced Setup and go to Login Information. Otherwise, select Manual Setup or Advanced Setup.
Step 2: Advance Setup (skip if your domain has Autodiscover)
Fill in the advanced details:
User information
Name: the name that will be displayed in emails as “From”. It can be your full name, the name of the Company, etc.
Email Address: your full email address, for example [email protected] or [email protected].
Server details
Mail server: the server will have your domain name, in this form: mydomain–com.w.emailarray.com.
Use this tool to generate the server name for your domain:
Step 3: Login Information
User Name / Email address / Username: your full email address
Password: the password of your email address (the existing password that you have set up when you created the email address)
Click the Finish button to complete the setup and now you can send a test mail.
If you want to use you Enhanced mailbox with devices such as Cummings generators or for a device that doesn’t support SSL, you can set it up as IMAP and use the ports for no encryption. Click here to view all server and ports configuration.
Getting help
Switching to a new e-mail provider can be intimidating. That’s why our Support Team is here to answer your questions.
To setup your new mailbox you can browse our FAQs and Wiki guide or you can talk to our Support Team through chat or ticketing system. Also, our Support Team can help you move your previous mailbox, contacts and calendar to your new one.