
WHMCS Client Area – A Reseller’s Guide to Managing Customer Email with Our WHMCS Module
Welcome to PolarisMail! We know that providing a seamless experience for your customers is a top priority. Our free WHMCS module is designed to do just that, giving your clients a simple and powerful way to manage their email hosting directly from your website.
This guide walks you through the customer management features, showing you exactly what your clients will see and do within the WHMCS Client Area.
1. Getting Started: Initial Setup
Before your customers can begin managing their services, you’ll need to set up the module and create your email hosting products. If you haven’t done this yet, our step-by-step guides will walk you through the process:
Module Installation: Follow our Setup Guide for the PolarisMail WHMCS Module.
Product Creation: Use our examples to create your hosting plans:
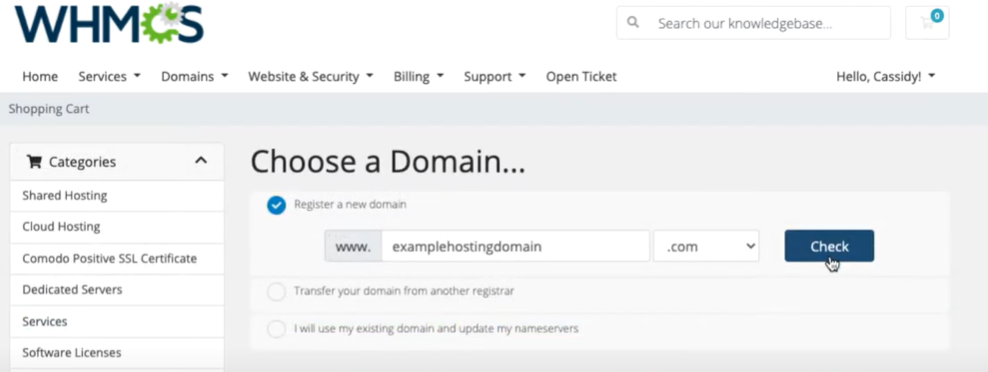
2. How Customer Orders & Domain Verification Work in WHMCS
When a customer orders an email hosting package from your site, WHMCS will require them to associate it with a domain. This is standard practice and helps keep services organized. Each email hosting package a customer purchases will appear as a separate, active service tied to its specific domain in their Client Area.
The Domain Verification
Security is our top priority. Immediately after placing an order, the service is created but locked until domain ownership is verified.
Your customer will see a DNS Verification screen displaying a unique TXT record. They will not be able to create mailboxes or manage settings until this step is complete.
To unlock the dashboard, the customer must:
- Copy the Value (the TXT string) shown on the screen.
- Add this as a TXT record in their domain’s DNS settings.
- Wait for the system to detect the record (usually within minutes).
| Type | Name/Host | Value | TTL |
|---|---|---|---|
| TXT | @ or yourdomain.com | Provided verification token | 3600 |
Once the domain is verified, the screen will automatically refresh to show the full management dashboard, allowing them to start creating email accounts immediately.
A single customer can have multiple services for different domains, all managed from one convenient dashboard.
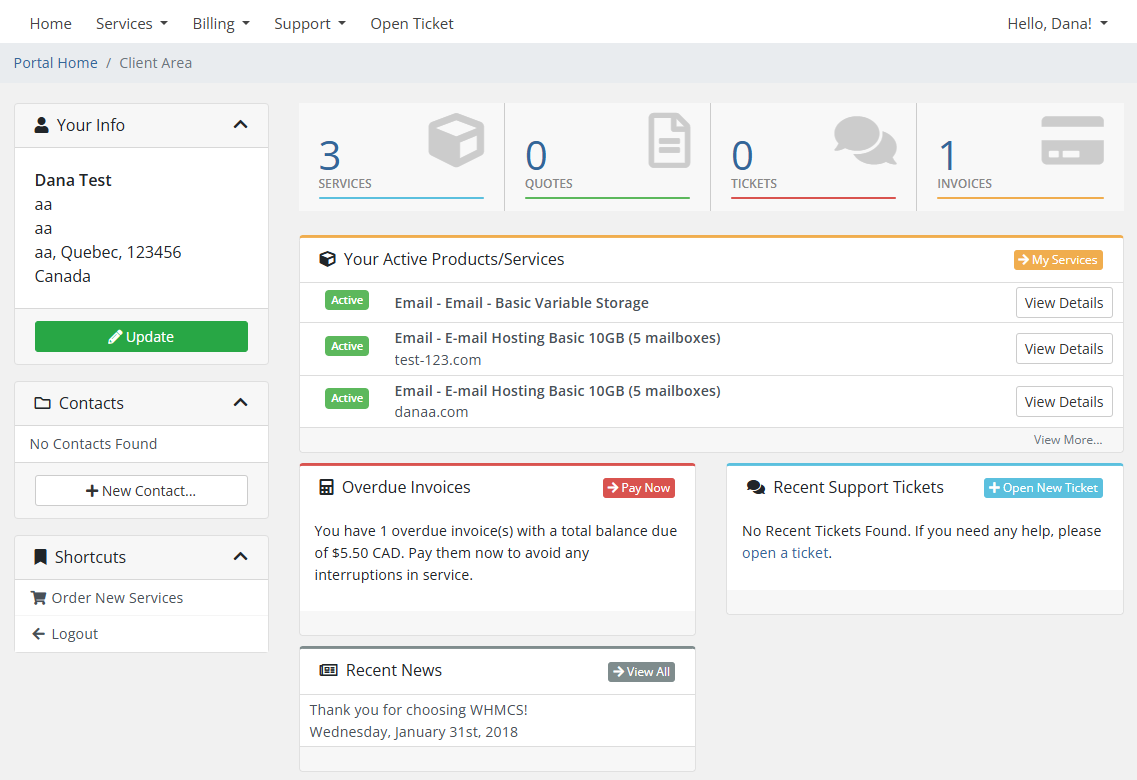
3. The Customer Experience: The WHMCS Client Area
Your clients will manage everything through their WHMCS Client Area (learn more about the WHMCS Client Area here)—a professional, self-service portal. From here, they can handle their mailboxes, aliases, and more without needing to contact you for basic tasks.
To get started, the customer simply clicks on their active email hosting product.
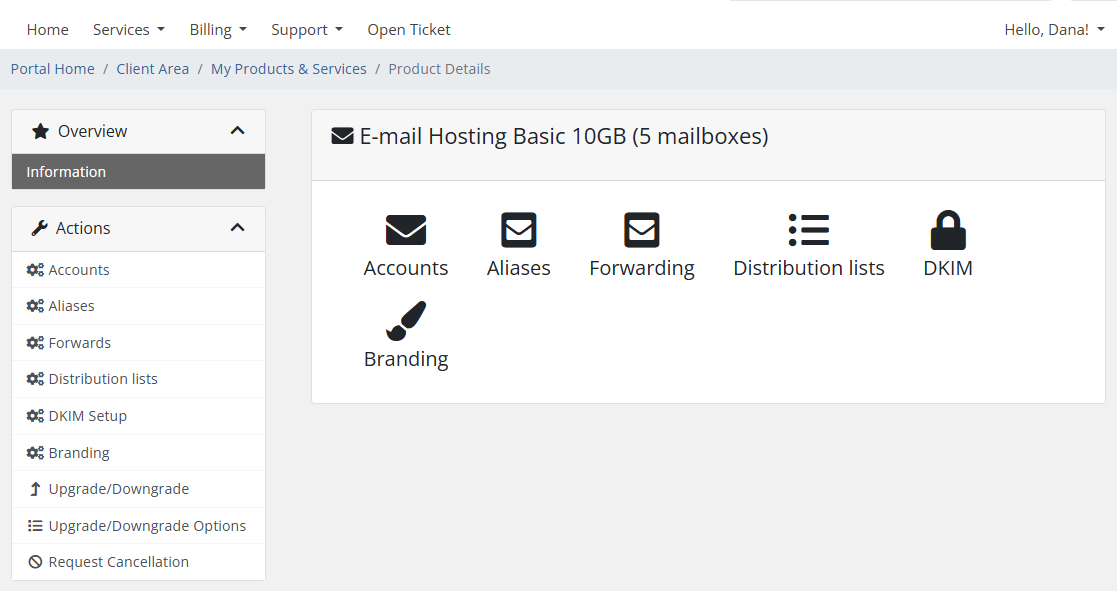
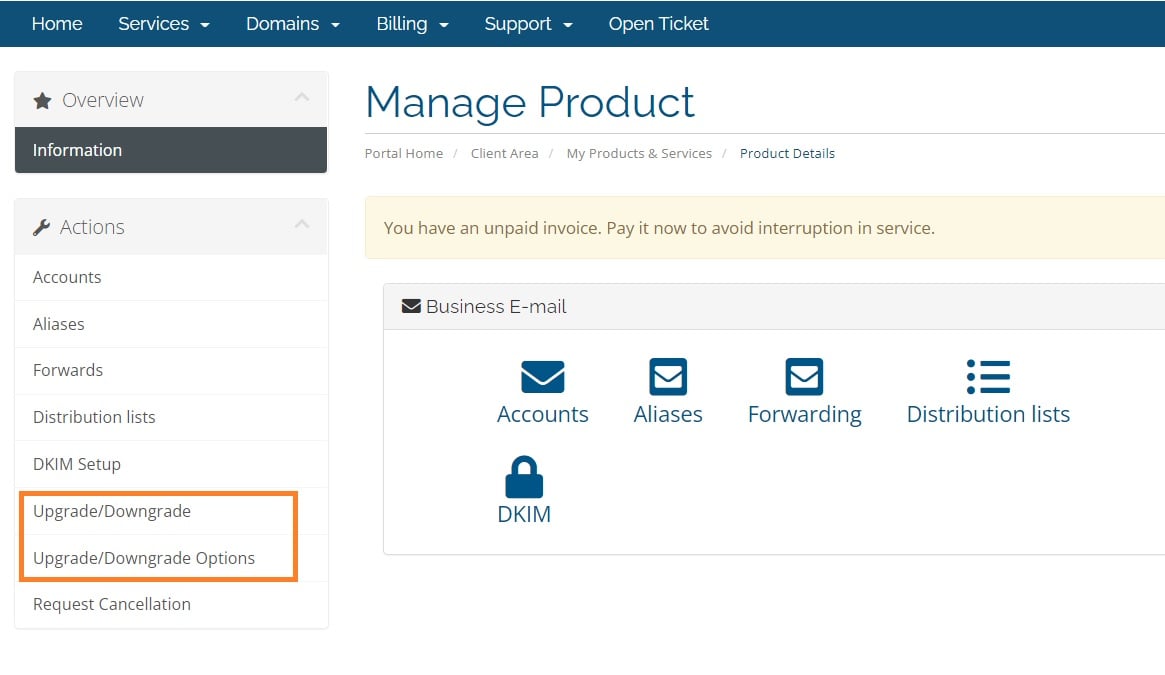
This takes them to their Email Hosting Dashboard, which features a clean icon-based menu and a sidebar for easy navigation. From here, they can access:
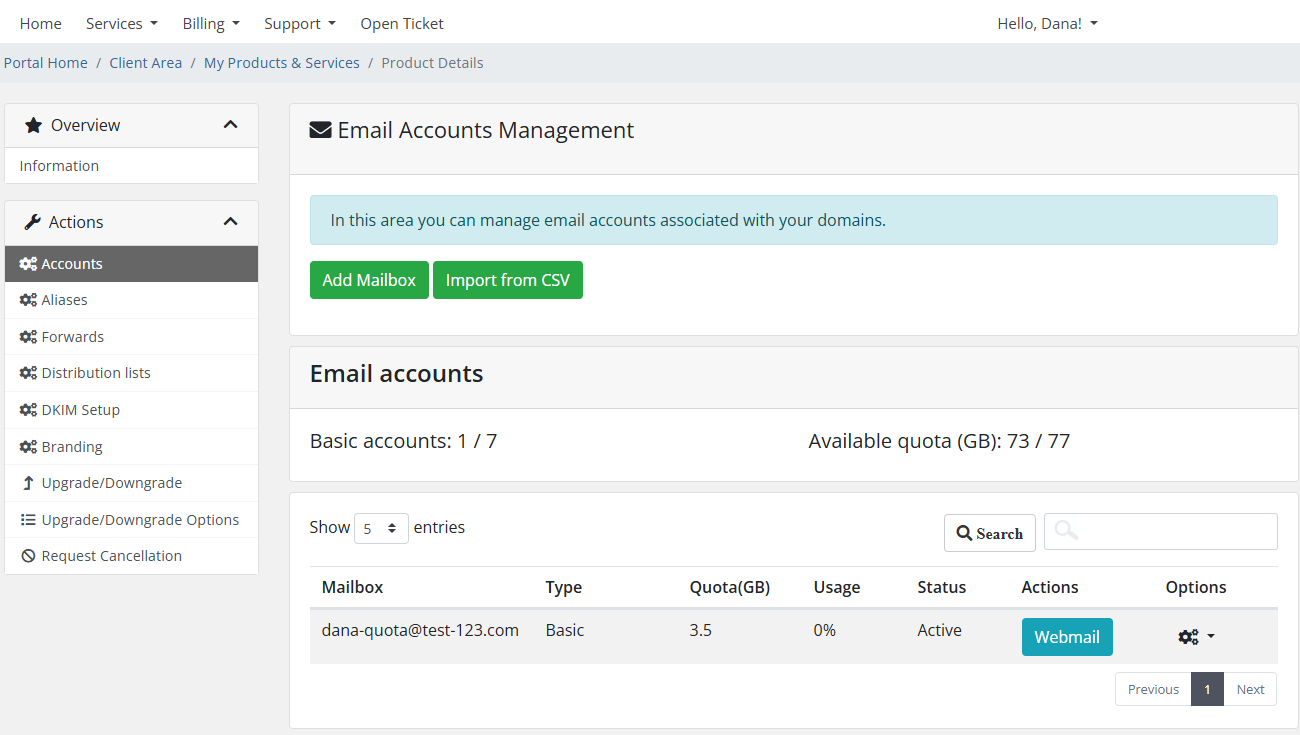
- Accounts: Create and manage individual mailboxes.
- Aliases: Set up email aliases.
- Forwarding: Manage email forwards.
- Distribution Lists: Create and manage group email lists.
- DKIM Setup: Configure DKIM for domain security.
- Branding: Customize the look of their Webmail login.
- Upgrade/Downgrade: Modify their plan or options.
- Request Cancellation: Cancel their service.
How to Add a New Mailbox
Creating a new mailbox is straightforward for your customers.
- From the dashboard, click the Accounts icon or menu item.
- Click the Add Mailbox button.
- Fill in the new user’s details (username, password, quota, etc.).
- Click Save.
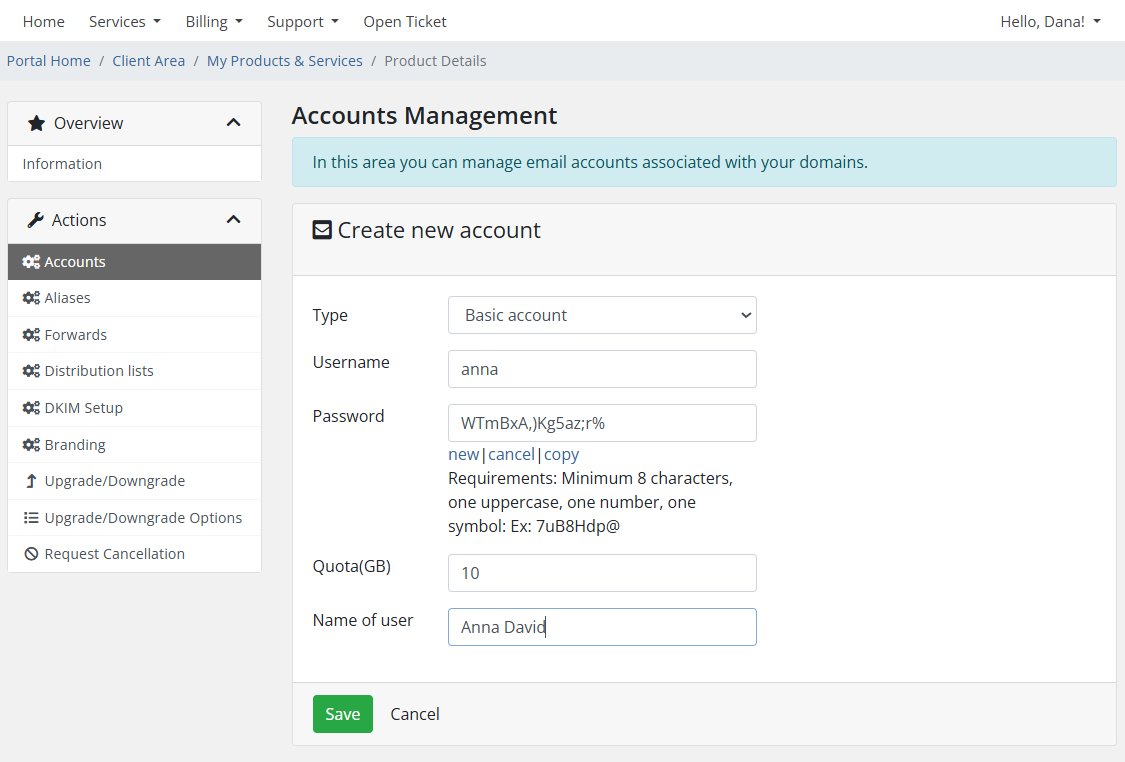
The new mailbox is created instantly and appears in their list of accounts.
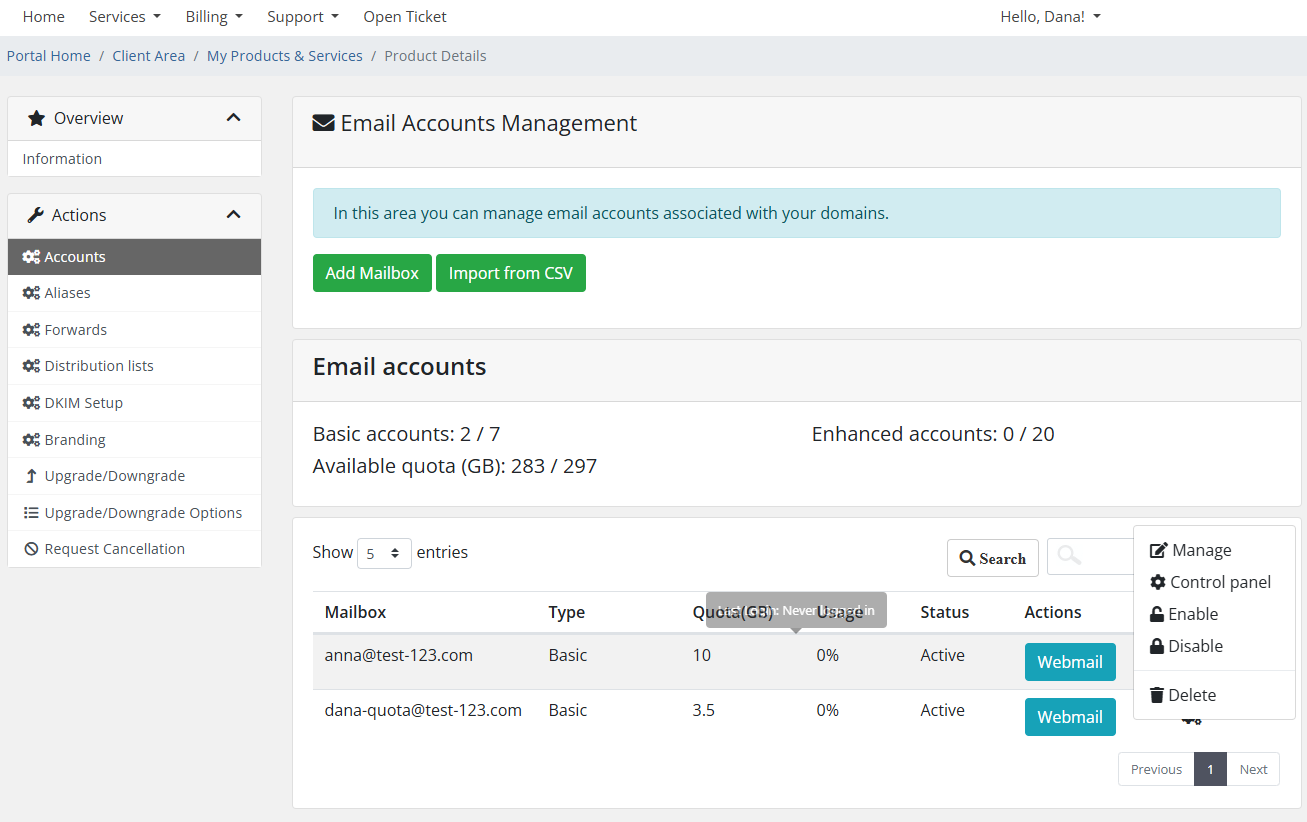
Accessing Webmail and Advanced Settings
Your customers have multiple ways to access their email and advanced features, all from the Accounts page.
To Log into Webmail:
- In the mailboxes list, simply click the Webmail button next to the desired account. This opens a new tab and logs them in automatically.
- Alternatively, they can navigate to https://login.emailarray.com and sign in with their full email address and password.
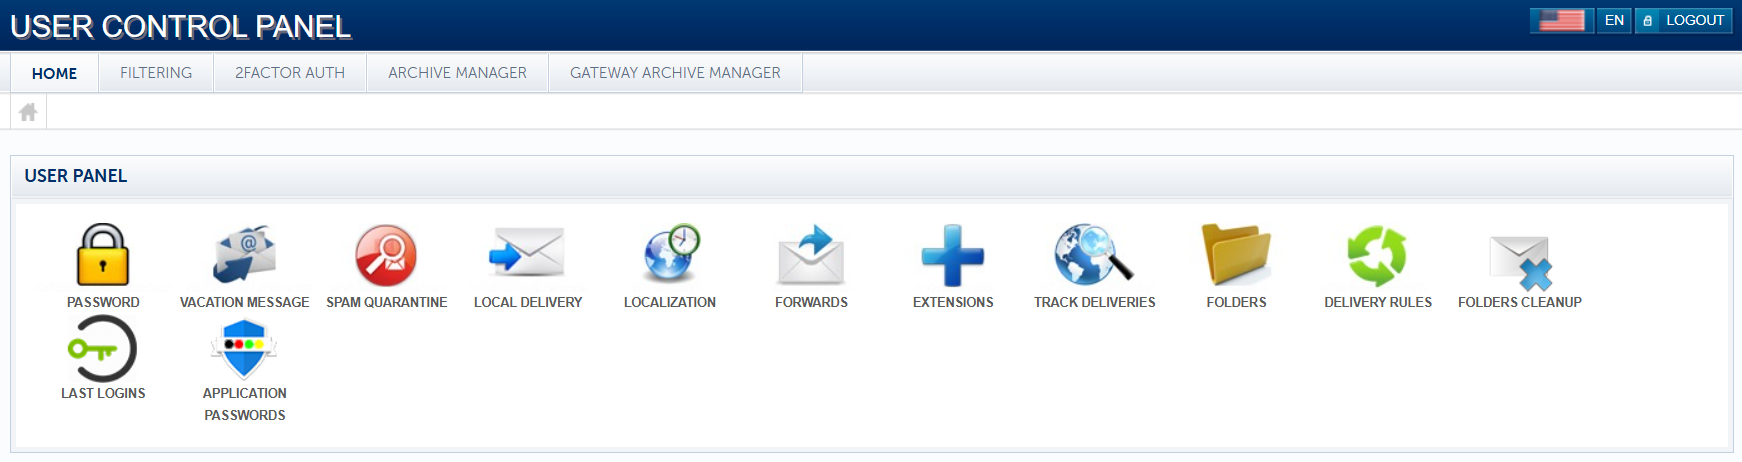
To Access the Advanced Control Panel:
For more advanced settings like vacation messages, spam quarantine, and delivery rules, customers can use the User Control Panel.
- In the mailboxes list, click the Settings icon (⚙️) next to the account.
- From the dropdown menu, select Control Panel.
- A new tab will open, logging them directly into the User Control Panel.
Alternatively, they can navigate to https://cp.emailarray.com and sign in with their full email address and password.
Upgrading a Mailbox or Plan
Flexibility is key, and our module makes it easy for customers to scale their services.
To Upgrade the Entire Product (e.g., add more mailboxes):
- From the main service dashboard, click Upgrade/Downgrade Options in the left sidebar.
- Adjust the number of mailboxes or other configurable options as needed.
- Click Continue to confirm the order.
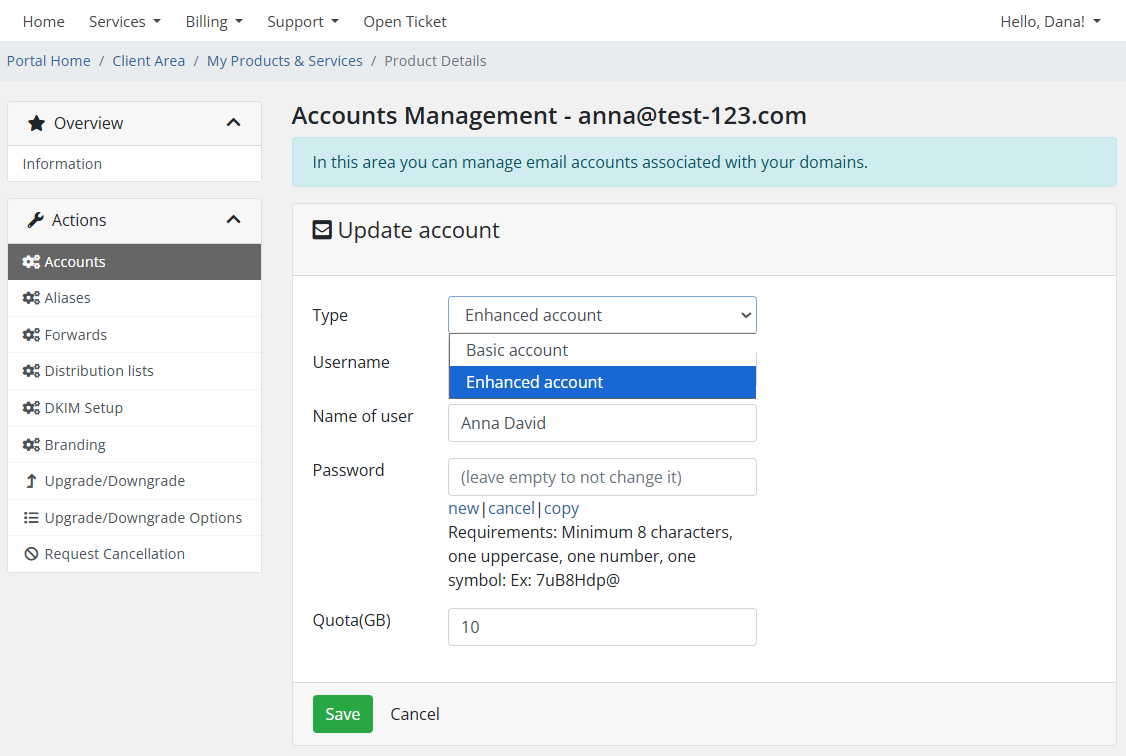
To Upgrade a Single Mailbox (e.g., from Basic to Enhanced):
- On the Accounts page, click the Settings icon (⚙️) next to the mailbox they wish to upgrade.
- Select Manage from the dropdown menu.
- On the “Update account” page, use the Type dropdown to select the new account type (e.g., Enhanced account).
- Click Save. The change is applied instantly, and WHMCS handles the prorated billing.
Remember, your customers can combine Basic and Enhanced mailboxes under the same domain. A small business could have ‘Enhanced’ mailboxes for its leadership team and ‘Basic’ mailboxes for general staff, all in one plan. This flexibility allows you to create the perfect, cost-effective solution for any client’s needs.
4. Managing a Customer’s Service from the WHMCS Admin Area
While the Client Area is designed for your customers to easily manage their own services, your WHMCS Admin Area gives you the power to provide hands-on support. This is perfect for troubleshooting issues, making changes on a client’s behalf, or for resellers who offer a fully managed email service.
Log in as Client for Seamless Support
One of the most powerful features at your disposal is the “Log in as Client” / “Log in as Owner” function. This allows you to view and interact with the WHMCS Client Area exactly as your customer does. You can see their dashboard, access their email service, add mailboxes, and perform any other action they can.
Simply navigate to a client’s profile in your WHMCS Admin Area, and you will find the “Log in as Client” option.
It’s the best way to troubleshoot an issue or guide a customer over the phone, as you’re seeing the exact same screen they are.
5. Important Information for Resellers
Admin Panel vs. Client Area: Your WHMCS Admin Panel is for you and your team only. Your customers will never access it. They manage their services exclusively through the WHMCS Client Area, Webmail, and the User Control Panel.
Cancellations and Terminations: If a customer requests cancellation or an invoice becomes overdue, WHMCS will automatically terminate the service. This action immediately deletes all associated mailboxes and data from our servers. If this happens by mistake, please contact our support team. We can attempt a data restore from backups, depending on how much time has passed since the deletion.
How to Get Support: As a PolarisMail Reseller, you are the first point of contact for your customers’ support needs. The WHMCS Client Area empowers them to solve most common tasks themselves. If your customer encounters an issue you can’t resolve, our expert support team is here to help you. We provide level 2 technical support to all our resellers via email and our ticketing system.
We’ll Handle the Migrations: When you sign up a new client who is moving from another provider, we can help. We offer free and seamless email migration to make the transition as smooth as possible. Just reach out to our support team to schedule a migration for your client.